How to Host WordPress Site in SeekaHost
Easy Steps to Host & Get Online Fast
Before we get started I suggest creating an account for free first. This can also be done during the process of starting your hosting but by creating your profile first, it will save you having to do so after choosing your WordPress package.
Step 01: Sign Up!
First sign into your account. If you don’t have an account yet, sign up. It’s free!

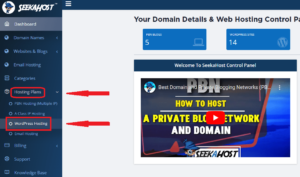
Step 02:Navigate to WordPress Hosting
Now it’s time to choose your hosting package, do this by selecting “Hosting Plans” and then clicking on “WordPress Hosting”.
Step 03:Choose From the Dashboard
Now we have our hosting package, let’s start our WordPress blog by first selecting “WordPress Sites” from the main dashboard.
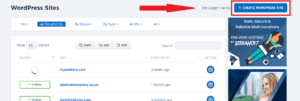
Step 04: Start the first connection
Now select “Create WordPress Site” to add your website and start the first connection.
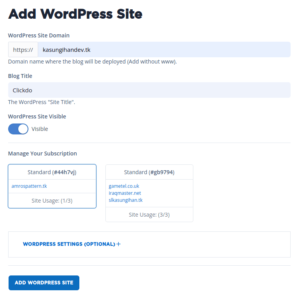
Step 05: Create your WordPress Site
On this screen, type in the name of your domain (without the www.) and then a blog title underneath, this can be changed later. Then choose the hosting package you chose earlier along the bottom and press “Create WordPress Site”.
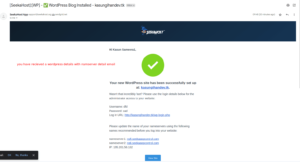
Step 06: Check Your Confirmation
The initial connection how now been made. You will now need to wait a few moments whilst this loads up. In the meantime, you can also check your emails for confirmation of the blog starting and your login information.

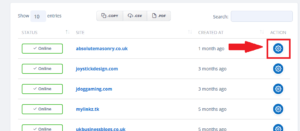
Step 07:Navigate to the Action button
Once loaded and it has the “Online” status showing, you can then click on the action button to the right of your site to go to the management page for the WP site.
Step 08:Check the Account Manage Tab
Here you can find all the relevant information for your blog, including your login details under the “Accounts manage” tab.
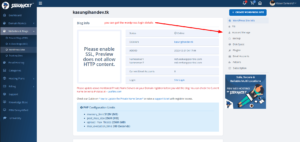
At this point, we have two options. If you purchased your domain here with SeekaHost, no further steps are needed. The nameservers will already be set up as the default nameservers and it’s just a case of waiting between 10-30 minutes for the connection to be made. This can also be done by clicking the “leafdns” option on your management screen and looking for the nameservers sections to have two ticks next to them.

You can now use the “Site Login” button to log into the back end of your website or type your URL followed by/wp-admin and then log in using your login details.
Remember, your curiosity knows no bounds, and neither does our support!
Reach out anytime – we’re here to answer your questions 24/7.
Happy exploring!