How To Host a Free WordPress Page
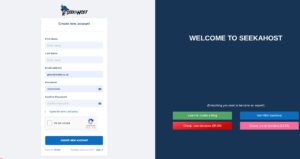
Step 01: Account Creation
Start by creating an account on SeekaHost by visiting https://portal.seekahost.app/register. This account will be the gateway to managing your WordPress hosting.
Step 02: Choose Hosting Plan
Once your account is set up, navigate to the WordPress hosting page within your SeekaHost dashboard and select the Free WordPress hosting plan. This plan is an excellent option if you’re just getting started with WordPress.
Step 03: Add Personal Details
In the next step, you’ll be prompted to add your personal details. This information helps SeekaHost set up your hosting environment effectively.
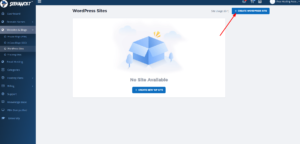
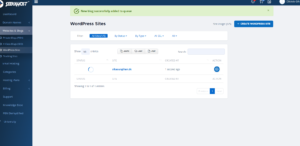
Step 04: Manage WordPress Installations
You’ll be taken to the WordPress table list, where you can manage your WordPress installations. Here, you can organize your sites and easily access them.

Step 05: Create a New Website
To create your WordPress site, click on the ‘Create’ option. This initiates the setup process for your new website.
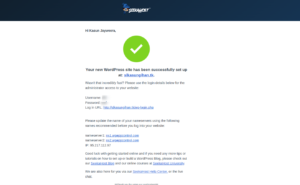
Step 06: Check Your Confirmation
The initial connection how now been made. You will now need to wait a few moments whilst this loads up. In the meantime, you can also check your emails for confirmation of the blog starting and your login information.
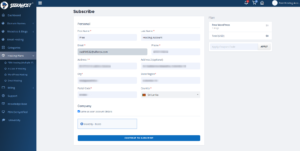
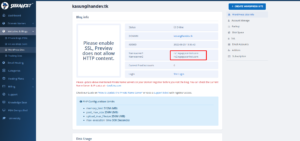
Step 07: Add Domain and Subscription
In the setup, you’ll need to add your domain name and select the free subscription. This is a crucial step to ensure your site is associated with the right domain and hosting plan.
Step 08: Installation Progress
After this, you’ll need to be a little patient as the system processes and installs your blog. This may take a few moments, but it’s worth the wait.
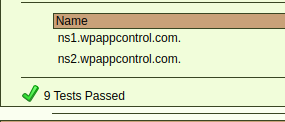
Step 09: Connect Domain
Once the installation finishes, you’ll be instructed to add the nameservers provided by SeekaHost to your domain provider. This connects your domain with your WordPress hosting, making your website accessible to visitors.